Ignite FB Tracking PixelDIY Storage guide: Making your own pegboard shelf - Lori Lockhart, PA
Coldwell Banker Realty
Lori Lockhart, PA, Coldwell Banker RealtyPhone: (941) 724-0595
Email: [email protected]

DIY Storage guide: Making your own pegboard shelf

by Lori Lockhart, PA 05/01/2024

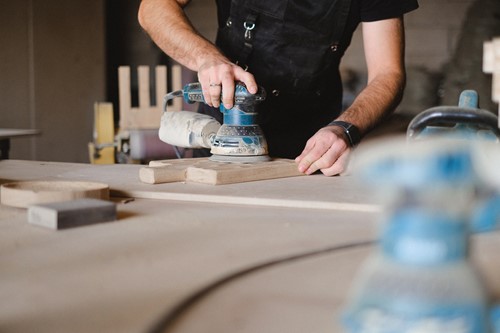
Wooden pegboard shelving units are a simple and cost-effective DIY storage solution. Extremely versatile and durable, pegboard shelving is perfect for anything from tool storage to jewelry organization and is one of the easier DIY storage ideas. If you’re interested in making a custom pegboard shelving unit, here is a guide to help:

DIY Pegboard tools & materials

The size of your pegboard is completely up to preference and how much storage space you need. If you plan to use your pegboard for office supplies or personal accessories, consider using a smaller base and thinner pegs.

  • ¾ inch plywood for the base
  • ½ inch plywood pieces for shelves
  • Wooden dowels for pegs
  • Wood screws
  • Drill
  • Drum sander
  • Hand sander
  • Measuring tape
  • Pencil

Step-by-step guide

  1. The first step to this DIY storage project is to carefully sand the entire piece of plywood for the base.
  2. Once the base plywood is smooth, use your measuring tape to measure where the peg holes will go. It’s helpful to make a paper template to mark each peg hole if you prefer not to mark the plywood directly.
  3. Following your marked spacing, drill holes with a ¾ inch bit.
  4. Use the drum sander to smooth the edges of each peg hole. Be careful not to sand too much, or you might accidentally make the hole too large for the peg to fit tightly.
  5. Cut your wooden dowels to the desired length. For this guide, use six-inch pegs.
  6. Create the shelf boards by cutting the ½ inch plywood into six-inch lengths. You can make the shelves whatever width you prefer. A variety of shelf sizes makes for a versatile and aesthetically pleasing pegboard.
  7. Sand all the shelf pieces to avoid splinters and splitting.
  8. Drill the base of the pegboard to the wall using large wood screws.
  9. With the pegboard base secured, it’s time to add the pegs and shelves. Arrange them however best fits your storage purposes.
  10. Pegboards are an excellent example of DIY storage. By making a custom pegboard of your own, you can save space and stay organized.
About the Author
Author

Lori Lockhart, PA

Lori Lockhart originally from York Pennsylvania has been a Sarasota resident and realtor for over 16 years. She specializes in Sarasota, Siesta Key, Lakewood Ranch, Bradenton, Venice and the surrounding areas. She is skillful at negotiating and partners with many professionals to offer the best resources to her clients. She is always accessible to her clients and listens to their needs first and foremost. She works with first time home buyers, luxury home owners as well as investors to help them achieve their real estate goals. She has a broad knowledge of the construction industry as she is a licensed Florida General Contractor. She is able to assess construction costs which are such a benefit to her clients as well as offering them advice with regards to new construction. Lori is energetic, hard-working, and strives to exceed her client's expectations by assisting them in every aspect of the transaction. Whether you're new to the area, buying a retirement home or investing in property she has a vast knowledge of it all!